1. المقدمة
This manual provides comprehensive instructions for the installation, operation, and maintenance of your Grover Roto-Grip Locking Rotomatic Tuners, Model 502G. Please read this manual thoroughly before installation and use to ensure proper function and longevity of your tuners.
2. انتهى المنتجview
The Grover Roto-Grip Locking Rotomatic Tuners are designed to provide enhanced tuning stability and quicker string changes for guitars. This set includes six gold-finished tuners, configured for a 3+3 headstock setup, featuring a locking mechanism to secure the string post.
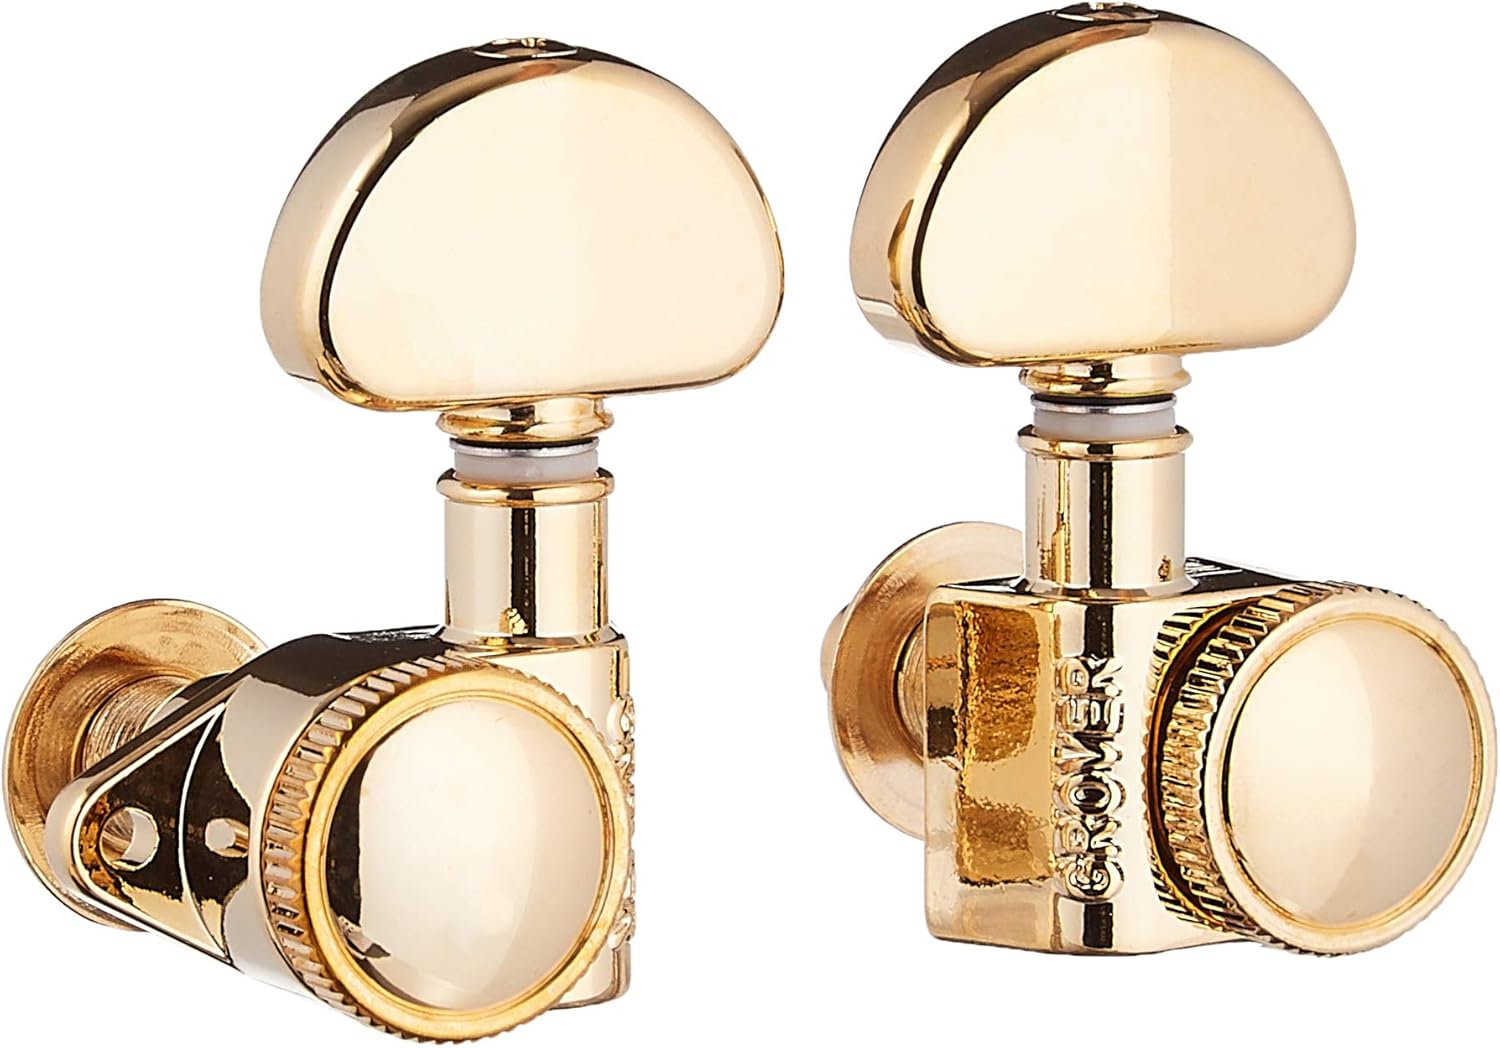
الشكل 2.1: الجبهة view of Grover Roto-Grip Locking Rotomatic Tuners (Model 502G). These tuners feature a gold finish and a classic Rotomatic design with an integrated locking mechanism.
3. محتويات العبوة
تأكد من وجود جميع العناصر في العبوة:
- 6 x Grover Roto-Grip Locking Rotomatic Tuners (3 left, 3 right)
- 6 x Threaded Bushings
- 6 × غسالات
- 6 × مسامير التثبيت
4. المواصفات
| ميزة | مواصفة |
|---|---|
| رقم الموديل | 502 جيجا |
| إعدادات | 3 Left / 3 Right (3+3) |
| ينهي | ذهب |
| يكتب | Locking Rotomatic Tuners |
| وزن العنصر | 9.6 أونصة (حوالي 272 جرامًا) |
| أبعاد المنتج | 9 × 5 × 2 بوصة (التغليف) |
| String Material Compatibility | Nickel-Plated (compatible with most guitar string types) |
| توافق الصك | Acoustic Guitar, Electric Guitar (standard 3+3 headstocks) |

Figure 4.1: Technical diagram illustrating the dimensions of the Grover Roto-Grip Tuners. Measurements are provided in inches and millimeters.
5. دليل التثبيت
Installation of Grover Roto-Grip tuners typically involves replacing existing tuners. Ensure the new tuners are compatible with your guitar's headstock bore holes and screw patterns. Professional installation is recommended if you are unfamiliar with guitar maintenance.
الأدوات المطلوبة:
- مفك صغير برأس فيليبس
- Wrench or socket for hex bushings (if applicable)
- String cutters
- Soft cloth to protect guitar finish
خطوات التثبيت:
- Remove Old Tuners: Carefully remove all strings from the guitar. Unscrew the mounting screws on the back of the headstock and remove any nuts or bushings from the front. Gently pull the old tuners out.
- Prepare Headstock: Clean any debris from the tuner holes. Ensure the holes are clear and smooth.
- Insert New Tuners: Insert the new Grover Roto-Grip tuners into the headstock holes from the back. Ensure the tuners are oriented correctly (3 left, 3 right) and that the mounting screw holes align with the existing holes or are positioned for new pilot holes if necessary.
- Secure Front Bushings: Place a washer over the tuner shaft on the front of the headstock, then thread the bushing onto the shaft. Tighten the bushing finger-tight, then use a wrench to gently snug it down. Do not overtighten, as this can damage the headstock finish.
- تثبيت مسامير التثبيت: Once the tuners are aligned and the bushings are snug, install the small mounting screws into the back of the headstock. If new pilot holes are needed, drill them carefully to avoid splitting the wood.

الشكل 5.1: الجانب view of a Grover Roto-Grip tuner, highlighting the locking knob at the back of the tuner housing.

الشكل 5.2: خلفي view of Grover Roto-Grip tuners, illustrating the gear mechanism and the position for the mounting screws.
6. تعليمات التشغيل
The Roto-Grip tuners simplify string changes and improve tuning stability through their locking mechanism.
Stringing Your Guitar with Roto-Grip Tuners:
- Unlock the Tuner: Turn the small knurled knob on the back of the tuner counter-clockwise until it stops. This unlocks the string post.
- Insert String: Thread the guitar string through the string hole in the tuner post. Pull the string taut, ensuring there is minimal slack.
- Lock the String: While holding the string taut, turn the knurled knob clockwise until it is finger-tight. This locks the string securely in place within the tuner post. Do not overtighten.
- Tune the String: Use the main tuning key to bring the string to the desired pitch. The locking mechanism minimizes string slippage, leading to greater tuning stability.
- Trim Excess String: Once tuned, trim any excess string close to the tuner post using string cutters.
7. الصيانة
Proper maintenance ensures the longevity and performance of your tuners.
- تنظيف: Wipe the tuners regularly with a soft, dry cloth to remove dust, sweat, and grime. Avoid abrasive cleaners or solvents that could damage the finish.
- تشحيم: The internal gears are factory-lubricated and generally do not require additional lubrication. If a tuner feels stiff, a very small amount of light machine oil can be applied to the gear mechanism, but avoid over-lubricating.
- فحص الضيق: Periodically check that the mounting screws and front bushings are snug. Overtightening can cause damage, so apply gentle pressure.
- تخزين: When not in use, store your guitar in a climate-controlled environment to prevent extreme temperature and humidity changes, which can affect both the guitar and its components.
8. استكشاف الأخطاء وإصلاحها
| مشكلة | السبب المحتمل | حل |
|---|---|---|
| Tuner slips or does not hold pitch | String not properly locked; insufficient string wraps; worn gears; nut/bridge issues. | Ensure the locking knob is tightened finger-tight. Check for proper string installation. Inspect gears for wear. Evaluate other guitar components (nut, bridge, tremolo) for friction points. |
| Tuner feels stiff or hard to turn | Lack of lubrication; dirt/debris in mechanism; overtightened bushing. | Clean the tuner. Apply a small amount of light machine oil to the gear. Loosen the front bushing slightly. |
| Tuner wobbles or is loose | Loose mounting screw; loose front bushing. | Gently tighten the mounting screw on the back of the headstock. Tighten the front bushing. |
9. الضمان والدعم
Grover products are manufactured to high standards. For specific warranty information or technical support, please refer to the official Grover webالموقع أو تواصل مع خدمة العملاء مباشرةً. احتفظ بإيصال الشراء كإثبات للشراء.
لمزيد من المساعدة، يمكنك زيارة Grover Store on Amazon أو اتصل ببائع التجزئة الخاص بك.