AOPEN Smart Projector
Smart System
User’s Guide
Copyright © 2021. AOPEN Incorporated.
All Rights Reserved.
AOPEN Projector User’s Guide
Original Issue: 12/2021
SMART FUNCTIONS
AOPEN Smart Remote Guideline

 Step 1: Connect the AOPEN smart device and the smart phone with AOPEN Smart Remote to the same network.
Step 2: Open ” AOPEN Quick Settings” and check the IP address.
Step 3: Key in the IP address of AOPEN smart device to the connection window, and select “PAIR” button.
Step 4: Connection success and the control panel would be available to use.
Basic Functions:
![]() Mute
Mute ![]() Back: Back to previous page.
Back: Back to previous page.![]() Volume Up
Volume Up ![]() Home: Back to launcher home page.
Home: Back to launcher home page.![]() Volume Down
Volume Down ![]() Keyboard
Keyboard![]() Introduction
Introduction ![]() Voice Input
Voice Input
Swipe on the navigation control panel: Control focused item.
Swipe on the mouse control panel: Control mopuse cursor.
3D mouse control: Hold the smart phone and change the phone position on control the mouse move.
Tap on control panel: Select/ Click
Long press on the control panel: Show shortcut key (Included home and back key)

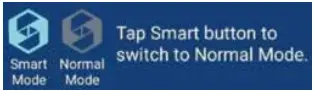
Smart mode: You can smoothly control the apps on your device.
Normal mode: When Normal mode is on, control modes can be switched through the toggle button.
Mouse mode: Use touch pad control mouse cursor.
Navigation mode: Use touch pad control focus.
Note:
- Specific button may show up according to different apps.
- AOPEN Smart Remote only support Android device.
Remote control layout

| # | Icon | Function | Description |
| 1 | Infrared transmitter | Sends signals to the projector. | |
| 2 | POWER | Turns the projector on or off. | |
| 3 | HOME | Back to Home page. | |
| 4 | Mouse | Smart mode: Switch to mouse mode for Navigation key. | |
| 5 | Select/Enter | Confirms your selection of items. | |
| 6 | Four directional select keys | Use up, down, left, right buttons to select items or make adjustments to your selection. | |
| 7 | BACK | Returns to the previous operation. | |
| 8 | SOURCE | Changes the active source. | |
| 9 | Volume Down | ||
| 10 | Volume Up | ||
| 11 | MENU | Press MENU to launch the Onscreen display (OSD) menu or exit the OSD menu. |
Home page overview
After the initial setup, the media center Home page will open:

- Aptoide app shortcut
- Bluetooth status
- Wi-Fi status
- System time
- App shortucts
- List of all apps
- File manager
- Wireless display
- Android settings
Navigating the AOPEN Smart Projector Home page
The items on the Home page can be accessed by using the remote control or Bluetooth mouse or AOPEN smart remote APP.
Note:
- The projector keypad supports the media center depending on the models.
- File management supports to read the USB disk, depending on the models.
• Remote control:
Press HOME![]() to access the Home page from any other page.
to access the Home page from any other page.
Press the four-direction navigation buttons (![]() /
/![]() /
/![]() /
/![]() ) to select items.
) to select items.
Press OK to confirm the selection, open an item, or play/pause media content.
Press BACK ![]() to move to the previous page or exit the app.
to move to the previous page or exit the app.
Press MOUSE ![]() to switch the remote control to the remote mouse mode.
to switch the remote control to the remote mouse mode.
• Bluetooth mouse:
Hover the cursor over the item you wish to open and left-click to open it.
Right-click to exit a menu or app.
Right-click repeatedly (if necessary) to access the Home page from any other page.
Configure system settings
To configure Android system settings, click Setting on the Home page.

Select a menu item to configure its preferences.
Network & Internet
Note: Before configuring the network settings, make sure the Wi-Fi dongle is connected to the USB port on the rear of the projector.
To connect the projector to an available Wi-Fi network, do the following:
1. Slide the Wi-Fi switch from Off to On.

2. Select your preferred access point from the Wi-Fi list and click on it to make the connection.

Note: If the selected Wi-Fi network is secured, you are prompted to enter a password.
Note: In the Network & Internet menu, you can also view Wi-Fi data usage, add Virtual Private Network (VPN), and configure Private DNS mode settings.
Set your device name
Change your device name when casting.
Apps
View recently opened apps, configure apps notifications, permissions, uninstall apps, and access settings.
Device preferences
Access the common settings and information about the device such as “About”, “Date & time”, “Language”, “Keyboard”, “Storage”, “Location”, “Securtiy & restrictions”, “Accessibility”, and “Reboot”.

Remotes & Accessories
Manage the accessories via Bluetooth connection.
Note: Please make sure your devices are in pairing mode before pairing.

Aptoide app
Aptoide app is pre-loaded app store that allows you to install and discover apps easily in a safe environment. Access games, streaming apps, configure Aptoide settings, and more.
Note:
- To use Aptoide app, make sure the projector is connected to the Wi-Fi network.
- Apps that are not pre-loaded by AOPEN may not be compatible or work properly.
- Some apps may require a keyboard and mouse.
- Some apps may be region-specific.
- Users can install third-party apps by .apk file in the File Management. However, some third-party apps may have compatibility issues.
- For better compatibility with Aptiode, it is recommended not to update the Aptoide app version at all.

Accessing apps
You can access apps directly from the Home page or from the APP List.
To view and access all the default apps, click APP List on the Home page.

Click directly on the app icon to open the app.
To add the app shortcuts to the Home page for quick access, do either of the following:
- Click
 and check up to two apps.

- Click Add APP and Back
 on the Home page directly and check up to two apps.

Note: depend on models.
Documents / Resources
 | AOPEN PV12 Smart Projector [pdf] User Guide PV12, Smart Projector, PV12 Smart Projector |


