![]()
 Product Manual
amaran Pano 120c
Introduction
Thank you for purchasing the amaran Pano 120c.
Designed for both mobile shoots and studio setups, the amaran Pano 120c is a compact, 120W full-color panel light combining ultra-high brightness with exceptional portability in a size comparable to a laptop. Its slim and lightweight design makes it perfect for outdoor mobile shoots or travelling to on-location studio setups, while its streamlined USB-C PD power delivery and amaran Ace E-Lock compatibility offers greater power flexibility for any shooting environment. And paired with included lighting accessories, the amaran Pano 120c is the ideal all-in-one, versatile lighting kit that can adapt to any creative project.
Components List
Please make sure all accessories listed below are complete before using. If not, please contact your sellers immediately.
amaran Pano 120c (Base Version)
 amaran Pano 120c Kit

Tip: The illustrations in the manual are diagrams for reference only. Due to the continuous development of new versions of the product, if there are any differences between the product and the user manual diagrams, please refer to the product itself.
Product Overview

| Power Button | Press to turn the light on, and hold for 1 second to turn the light off. The indicator light will be on when the light is powered on. |
| Return Button | Click to return to the previous menu screen. Hold or double click on the return button to execute customizable shortcuts set in Custom Mode. |
| Function Control Knob | Rotate to toggle the menu or adjust values and lighting settings. Press the knob to confirm parameters. |
| Display Menu Screen | Displays settings and status of your light. |
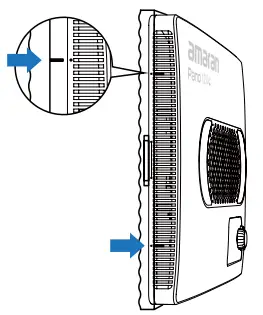
| Fan Vent | Helps the light dissipate heat. Please do not block the fan vent when using the light. |
| amaran Ace E-Lock Quick-Release Mount | Install and disassemble the light in less than a second with the amaran Ace Lock ecosystem. The light can also be powered by the amaran Peak power bank accessory. .The amaran Peak power bank accessory is sold separately. |
| USB-C Charging Port | Used to charge the fixture via a PD-supported power supply. |
| DC Power Input Port | Used to charge the fixture with the included amaran 150W DC Locking Power Adapter. The included DC cable is pull-resistant, avoid pulling the cable with force to prevent damage. |
| 1/4-20in Screw Mount | Mount the light onto 1/4-20in tripods or other equipment. |
| amaran Ace Lock Contact Pins | Locks into place on the lights amaran Ace E-Lock quick-release mount to secure the light. |
| amaran Ace Lock Unlock Button | Press the button to detach the amaran Ace Lock mounting bracket from the light. |
| Tilting Bracket Knob | Rotate to lock and unlock the mounting bracket to adjust the angle of the fight. |
| Locking Knob | Rotate to lock and unlock the mounting bracket from the light stand. |
Operations
- Power Supply
Power Supply Method 1: Use the included amaran 150W DC Locking Power Adapter to supply power to the light. Plug the end of the Power Adapter into the charging port of the light. The included Locking Power Adapter is pull-resistant. Press the lock when inserting and removing the cable, and avoid pulling the cable with force to prevent damage. Power Supply Method 2: Supply power to the light via other PD power supply devices or power banks. Plug the output port of the PD power supply device into the charging port of the light. Please ensure that the power supply can output a minimum of 65W of power. If a power supply below 140W of power output is used, the brightness of the lamp will be reduced or may be unable to light up.
 Power Supply Method 3: Supply power to the light via the amaran Peak portable power supply. The battery handle features amaran Ace E-Lock Contact Pins, and will power the light on when mounted via the amaran Ace E-Lock Quick-Release Mount.
 Note: The amaran Pano 120c supports power supply standards of USB PD3.0 and above, but is not compatible with some third-party private charging protocols. It is recommended to use PD3.1 standards of 140W power output and above. Please ensure to select the appropriate power supply device. If the selected power supply device cannot power the light at full power, a pop-up window will appear on the display menu screen to limit the maximum brightness.
The amaran Peak power bank accessory is sold separately. - Power On/Off
1. After connecting to the power supply, press the power button on the back of the fixture to turn the light on, and hold for 1 second to turn the light off. The light will resume to its previous settings prior to turning off.
2. You can select your preferred language when you turn the light on for the first time. Rotate the knob to select your language. Click to confirm.
- Light Installation
1. Installing the amaran Ace Lock Adapter:
Align the contact pins on the mounting bracket to the light’s amaran Ace Lock quick release mount. Press the blue release key and push towards the bottom of the light. The mounting bracket is securely attached to the light when the pins are embedded into the amaran Ace lock mount and when you hear a clicking noise.
Please ensure that the blue release key is facing the back of the light to avoid reverse installation.
- Installing Onto A Light Stand: With the mounting bracket installed onto the light, place the end of the mounting bracket onto the light stand and turn the locking knob to secure into place. Adjust the angle of the light and turn the tilting bracket knob to secure into place.

- Dissemabling the Light:
To diassemble, press the blue release key on the mounting bracket and pull the light upwards away from the mounting bracket. To avoid damaging the light and bracket, do not disassemble by force.
- Installing via 1/4-20in Screw Mount:
The top of the light features a 1/4-20in screw mount for mounting the light onto 1/4-20in tripods or other equipment.
Softbox Installation
- Unfold the softbox and place the diffusion cloth side downwards onto a flat surface.
- To install the softbox onto the light, place the light with the light-emitting surface side downwards onto the frame of the softbox. Pull the handles on the sides of the softbox to ensure that the softbox is fully unfolded and that the light is firmly installed into the softbox frame.
- Pull the elastic straps on the softbox over the light. Adjust the position of the softbox and ensure that the edges of the softbox are aligned with the edges of the light.
 Note: To prevent the softbox from blocking the fan and affecting heat dissipation or light spill, please ensure that the softbox securely wraps around the edges of the light.
Light Control Grid Installation
- Please ensure that the softbox is fully opened prior to installing the light control grid.
- To install the light control grid onto the softbox, expand the light control grid and align with the 4 corners of the softbox.
- To ensures that the grid is firmly installed onto the softbox, fasten the Velcro around the light control grid to the softbox and ensure it is flat.

Diffuser Installation
- Unfold the diffuser and pull the hook side towards the light.
- To install the diffuser onto the softbox, place the hook on the side of the diffuser into the light’s heat dissipation hole. Repeat to hook on the other side to securely install the diffuser cover.
Note: Please ensure that the diffuser is positioned correctly to prevent it from exceeding the edges of the light.
Barn Doors Installation
- Ensure that the barn door leaves are closed and place facing downwards on a flat surface. Open the wire clasp on both sides,place the light into the frame of the barn doors.
- To install the barn doors onto the light, place the wire clasp into the light’s heat dissipation hole. Repeat to place on the other side to securely install the barn doors. Ensure the installation is secure to prevent it from vibrating loose *The amaran Pano 120c Barn Doors are sold separately.

Rotate and press the knob to select light modes and settings.

8.1. CCT
Rotate and press the knob to enter CCT mode from the main menu. In CCT mode, press the knob to select INT or CCT and rotate the dial to adjust the corresponding value.

- INT (Intensity): Adjust your light’s brightness from 0%-100%.
- CCT (Correlated Color Temperature): Adjust your light’s color temperature from warm white (2,300K CCT) to cool white (10,000K CCT).
- G/M (Green-Magenta): Adjust the green-megenta shift in ±10 increments.
- After 3 minutes of inactivity while the light is in CCT Mode, it will automatically switch to “Quick Operation Mode”. Quick Operation Mode allows you to quickly adjust your light’s settings without toggling through the menu.
The menu screen will display the current color temperature value and brightness level. Rotate the control knob to adjust your brightness levels. Press and rotate the knob to adjust your color temperature value from warm white to cool white. Press the Return button to exit Quick Operation Mode and return to your previous interface.
8.2. HSI
Rotate and press the knob to enter HSI mode from the main menu. In HSI, press the knob to select INT, HUE, or SAT and rotate the dial to adjust the corresponding value.

- INT (Intensity): Adjust your light’s brightness from 0%-100%.
- HUE: Adjust your light’s hue value from 1º to 360º.
- SAT (Saturation): Adjust the saturation of the color from 0%-100%.
8.3. RGB
Rotate and press the knob to enter RGB mode from the main menu. In RGB, press the knob to select INT, Red, Green, or Blue and rotate the dial to adjust the corresponding value.

- INT (Intensity): Adjust your light’s brightness from 0%-100%.
- Red: Adjust your light’s Red value from 0%-100%.
- Green: Adjust your light’s Green value from 0%-100%.
- Blue: Adjust your light’s Blue value from 0%-100%.
8.4. FX
Rotate and press the knob to enter FX mode from the main menu. In FX. rotate and press the knob to select your lighting effect. Press again to enter the settings and rotate the dial to adjust the corresponding value.
Supported Lighting Effects:
| Fireworks | Faulty Bulb | Lightning | TV | Pulsing | Strobe |
| Explosion | Fire | Paparazzi | Welding | Cop Car | Party Lights |

8.5. Bluetooth Reset
Rotate and press the knob to enter BT mode from the main menu. Hold down on the knob until the end of the progress bar. Release the knob to cancel.

8.6. Custom Mode
Rotate and press the knob to enter Custom mode from the main menu. In Custom mode, press the knob to select customizable shortcuts for long press (Hold) or double click (Double) of the Return button. Rotate the dial to select between None/CCT/Rotation/HSI/ BT Reset shorcut functions. Short press of the return button defaults to the return/back function and cannot be changed.

8.7. Language
Rotate and press the knob to enter Language settings from the main menu. In Language, rotate the dial to toggle between English or Chinese. Press the knob to confirm your language.

8.8. Fan Mode
Rotate and press the knob to enter Fan mode from the main menu. In Fan mode, rotate the dial to toggle between Silent and Smart fan mode. Press the knob to confirm your settings.

Silent Mode:
The fan will be completely turned off, and the light will not produce any noise. The power output will be limited to 25W.
Smart Mode:
The fan speed will automatically adjust according to the temperature of the light.
8.9. Studio Mode
Rotate and press the knob to enter Studio mode from the main menu. Press the knob to cycle between On/Off. When Studio mode is turned on, the light will automatically turn on after connecting to a power supply, reducing the need to manually press the power button.

8.10 Expanded CCT
Rotate and press the knob to enter the Expanded CCT mode from the main menu. Press the knob to cycle between On/Off. When Expanded CCT mode is turned on, the adjustable color temperature in CCT mode is expanded to 1,800K to 20,000K CCT. Please note that the color rendering when in the expanded CCT range is lower.

Firmware updates
Firmware updates can be updated online via the amaran app or Sidus Link.

Using the amaran App
You can download the amaran mobile app from the iOS App Store, Google Play Store, and other platforms for enhancing the functionality of the light. You can download the amaran desktop app for Mac and Windows from the amaran website. Please visit amarancreators.com for more details on how to use the app to control your amaran lights.
 |  |
| https://qrfy.io/3APkqnUji8 | https://qrfy.io/41pha58rv2 |
Specifications
| Max Power Input | 140W | Max Power Output | 120W |
| CCT | 2,300-10,000K | Lumens | 13,855Iumens@5600K 12,149Iumens@3200K |
| CRI | 96 | TLCI | 97 |
| TM-30 Rg (Average) | 101 | TM-30 Rf (Average) | 93 |
| SSI(D32) | 84 | 551 (D56) | 74 |
| Beam Angle (No Accessory) | 45° | Color Chipset | RGBWW |
| Operating Temperature | -10°C -40°C | Storage Temperature | -20°C – 80°C -4 °F – 176 °F |
| Control Methods | On-board, amaran App, Sidus Link | Firmware Upgradeable | amaran App, Sidus Link |
| Screen Type | TFT | Wireless Operating Range (Bluetooth) | 580m 5262.5ft |
| Adapter Input Voltage | AC 110V-220V | Cooling Method | Fan cooling |
| Operating Voltage | DC 24V PD 28V | Adapter Cable Length | 2.5m/8.20ft |
| Beam Angle (Light Control Grid) | 45° | AC Cable Length | 2m/6.56ft |
| Light Dimensions | 35.5×25.6×3.6cm 14x10x1.4in | Light Weight | 1.6kg/3.51b |
| Softbox Dimensions | 41.5×30.5×10.3cm 16.3x12x4in | Softbox Weight | 0.35kg/0.81b |
| Light Control Grid Dimensions | 42×31.4x7cm 16.5×12.2×2.8in | Light Control Grid Weight | 0.15kg/0.31b |
*The above technical specifications are from the Aputure laboratory, and there may be some variation between individual units.
Photometrics
| CCT | Distance | No Accessories | Softbox | Light Control Grid | Diffuser |
| 2,300K | 1m | 10,880 lux | 2,950 lux | 2,335 lux | 2,700 lux |
| 1,011 fc | 274 fc | 217 fc | 251 fc | ||
| 3m | 1,310 lux | 312 lux | 284 lux | 303 lux | |
| 122 fc | 29 fc | 26 fc | 28 fc | ||
| 3,200K | 1m | 1,1870 lux | 3,240 lux | 2,558 lux | 2,910 lux |
| 1,103 fc | 301 fc | 238 fc | 270 fc | ||
| 3m | 1,435 lux | 344 lux | 310 lux | 331 lux | |
| 133 fc | 32 fc | 29 fc | 31 fc | ||
| 4,300K | 1m | 12,630 lux | 3,450 lux | 2,710 lux | 3,080 lux |
| 1173 fc | 321 fc | 252 fc | 286 fc | ||
| 3m | 1,529 lux | 365 lux | 330 lux | 351 lux | |
| 142 fc | 34 fc | 31 fc | 33 fc | ||
| 5,600K | 1m | 13,260 lux | 3,620 lux | 2,835 lux | 3,220 lux |
| 1,232 fc | 336 fc | 263 fc | 299 fc | ||
| 3m | 1,610 lux | 382 lux | 345 lux | 368 lux | |
| 150 fc | 35 fc | 32 fc | 34 fc | ||
| 6,500K | 1m | 13,490 lux | 3,680 lux | 2,880 lux | 3,260 lux |
| 1,253 fc | 342 fc | 268 fc | 303 fc | ||
| 3m | 1,639 lux | 390 lux | 351 lux | 375 lux | |
| 152 fc | 36 fc | 33 fc | 35 fc |
*The above technical specifications are from the Aputure laboratory, and there may be some variation between individual units.
Safety Instructions
When using the amaran Pano 120c, basic safety precautions should always be followed, including the following:
- Read and understand all instructions before using.
- Please have the product checked by an authorized service personnel agent if the product has a problem. Any malfunctions caused by unauthorized disassembly are not covered by the warranty. The user may pay for maintenance.
- Please do not place the fixture in high temperature environments for long periods of time, as it will accelerate the aging of the product and shorten its service life.
- Close supervision is necessary when any fixture is used by or near children. Do not leave the fixture unattended while in use.
- Do not operate the fixture if a cord is damaged, or if the fixture has been dropped or damaged, until it has been examined by qualified service personnel.
- This fixture is not waterproof. Please do not use the light fixture in wet conditions on account of electric shock may be caused.
- Please do not block the ventilation or look at the LED light source directly when it is powered on. Please do not touch the LED light source in any condition.
- When using the fixture for long periods of time in high temperature environments above 40ºC / 104ºF, care must be taken as burns can occur from touching hot surfaces.
- Please do not place the unit near any flammable object.
- Avoid rapid shaking or rotating of the light when moving the light stand to prevent damage to the amaran Ace Lock quick-release mount.
- We recommend only using the original amaran power adapter and regular power bank accessories. Please note that any malfunctions caused by using unauthorized accessories are not covered by the warranty. The user may pay for maintenance.
- This product is certified by ROHS inspection report. Please operate the product in full compliance with relevant country’s standards. Any malfunctions caused by incorrect use are not covered by warranty. The user may pay for maintenance.
- The instructions and information in this manual are based on thorough, controlled company testing procedures. Further notice will not be given if the design or specifications change.
FCC Declaration of Conformity
WARNING
Changes or modications not expressly approved by the party responsible for compliance could void the user’s authority to operate the equipment.
NOTICE
This equipment has been tested and found to comply with the limits for a Class B digital device, pursuant to Part 15 of the FCC Rules. These limits are designed to provide reasonable protection against harmful interference in a residential installation. This equipment generates, uses, and can radiate radio frequency energy and, if not installed and used in accordance with the instructions, may cause harmful interference to radio communications. However, there is no guarantee that interference will not occur in a particular installation.
If this equipment does cause harmful interference to radio or television reception, which can be determined by turning the equipment off and on, the user is encouraged to try to reorient or relocate the receiving antenna.
- Increase the separation between the equipment and receiver.
- Connect the equipment to an outlet on a different circuit than the receiver is connected to.
- Consult the dealer or an experienced radio/TV technician for help.
RF Warning Statement
This device has been evaluated to meet general RF exposure requirements.
Disclaimer
It is important to read the product manual of this product prior to use in order to ensure proper use with a complete understanding. The product manual should be securely stored for future reference after reading. Improper operation of this product may result in severe personal injury to yourself or others, as well as potential damage to the product and loss of property. As soon as you use the product, you are deemed to have understood, recognized and accepted all the terms and contents of the product manual. Users assume responsibility for their own conduct and any resulting consequences. amaran is not liable for any damages suffered as a result of the user’s failure to use the product in accordance
with product manual.
Please visit the official amarancreators.com website for the latest product information.
![]()
Documents / Resources
 | amaran Pano 120c RGB COB Mobile Light Panel [pdf] Instruction Manual 120c, Pano 120c RGB COB Mobile Light Panel, RGB COB Mobile Light Panel, Mobile Light Panel, Light Panel |