FS IPC204-5M-P-V1 Ptz Dome Network Camera
Introduction
Thank you for choosing the IPC204-5M-P-V1 P TZ Dome Network Camera. This guide is designed to familiarize you with the structure of the camera and describes how to deploy it in your network.

Accessories

NOTE: The accessories may vary from illustration, please prevail in kind.
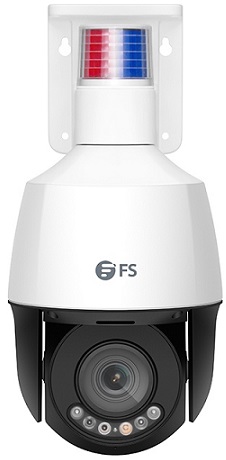
Hardware Overview

Installation Requirements
Precautions
- Use a power adapter or a POE device that meets the requirements. Otherwise, the device may be damaged.
- Make sure the length of the power cable between the power adapter and the camera is not too long, otherwise the camera might work abnormally because of the lowered voltage. If necessary, lengthen the cable between the power adapter and the mains.
- Do not overbend the cables during the installation, otherwise, poor cable contact may cause malfunction.
- When connecting to an external interface, use an existing connection terminal, and ensure that the cable terminal (latch or clamp) is in good condition and properly fastened.
- Ensure that the cable is not tense during mounting, with a proper margin reserved to avoid poor port contact or loosening caused by shock or shake.
- Do not remove the protective film on the device until mounting is finished. Remove it before powering on the device.
- Contact professionals for maintenance information. Do not attempt to dismantle the device by yourself. We shall not assume any responsibility for problems caused by unauthorized repair or maintenance.
Maintenance
- If there is dust on the front glass surface, remove the dust gently using an oil-free brush or a dust blowing ball.
- Clean the glass surface gently from the center outward using the lens cleaning cloth. If necessary, use the cloth dipped with detergent.
- Do not use organic solvents (benzene, alcohol, etc.) to clean the camera.
Installation
Inserting the SD Card (Optional)

Remove the back cover of the camera to insert the Micro SD card.
CAUTION:
- Before you insert or remove the Micro SD card, be sure to disconnect the power and wait till the camera stops operation; otherwise, the camera or the Micro SD card may be damaged.
- Do not hot plug the Micro SD card after it is inserted.
NOTE:
- Do not disassemble the device in high humidity environment. The high humidity inside the device will cause lens fogging.
- Remember to format the Micro SD card before use. The Micro SD can be formatted by the camera’s Ethernet interface.
Installing the Waterproof Kit (Optional)

Install the supplied waterproof kit to the Ethernet cable/DC cable.
NOTE: Please use the self-adhesive waterproof tape (purchased separately) to protect the cable.
Mounting the Camera
Wall Mounting/CeiIing Mounting

- Attach the sticker to the wall/ceiling, and align the cross center to the hole on the wall/ceiling.
NOTE:- Make sure the wall or ceiling is strong enough to support the weight of the camera.
- Prepare tools and hardware accessories in advance.

- Drill guide holes (diameter: depth: 30mm) in the marked locations.

- Knock the plastic anchors into the guide holes.

- Secure the camera base to the wall/ceiling with the supplied screws.
Connecting the Power
PoE Device

Use an Ethernet cable to connect the Ethernet interface of the camera to the POE port on a POE device, such as a POE switch or a POE NVR.
Power Adapter

Use the power adapter (purchased separately) to connect the power interface of the camera to the local power source.
Camera Login
Step 1: Connect the computer to the camera on the same LAN.

Step 2: Set the IP address of the computer to 192.168.1 .x is any number from 2 to 254).

Step 3: Open a browser, type http://1 92.168.1.13 and enter the default username and password, admin/admin.
Step 4: Click Login to display the web-based configuration page.
Product Warranty
FS ensures our customers that for any damage or faulty items due to our workmanship, we will offer a free return within 30 days from the day you receive your goods. This excludes any custom-made items or tailored solutions.
 Warranty. The product enjoys a 2-year limited warranty against defects in materials or workmanship. For more details about the warranty, please check at https://www.fs.com/policies/warranty.html
 Return: If you want to return the item(s), information on how to return can be found at https://www.fs.com/policies/day_return_policy.html
Online Resources
For additional technical documents, visit: https://www.fs.com/technical_documents.html

Download the FS App
Scan the QR code to download and install the FS app from the App Store or Google Play Store or go to https://www.fs.com/appdownload.html


Documents / Resources
 | FS IPC204-5M-P-V1 Ptz Dome Network Camera [pdf] User Guide IPC204-5M-P-V1, IPC204-5M-P-V1 Ptz Dome Network Camera, IPC204-5M-P-V1 Ptz, Dome Network Camera, Network Camera, Camera |