

FMS Reflex V3 Stable Flight Controller
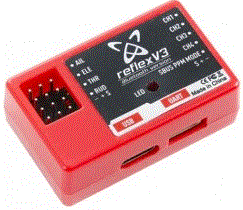
reflexV3
Bluetooth version
scan the QR code to download the app
Reflex system overview
- Utilizes a high-speed 32-bit ARM processor onboard.
- Sensors: Solid-state 3 axis gyro and 3 axis accelerometer.
- Automatically recognizes SBUS/PPM/PWM systems, compatible with all radio systems with 4 channels or above.
- Reflex V3 version can be connected to a mobile app via Bluetooth after power-on, unlocking parameter setting functions (available for non-FMS models as well).
- User-friendly operation: Synchronize required parameters through computer software or mobile app, connect Reflex V3 to the receiver, and set up the corresponding channels and directions on the remote controller. (Note: Parameter setting functions are only supported by the mobile app.)
Reflex functions
3 flight modes are available: Stabilized, Optimized or off. This is controlled with a 2 or 3 position switch on the transmitter. When assigned to a 2 position switch, the Reflex system switches between stabilized and optimized modes.
Stabilized mode-
Designed for beginners, Reflex will rapidly level the aircraft from any attitude when this mode is activated. Stabilized mode combines accelerometer and gyro data to determine how to level the aircraft when the control sticks are released- giving pilots absolute peace of mind.
Note: The aircraft will maintain level flight with 50~60% throttle. The aircraft will climb under full throttle.
OFF-
Turns off all gyro functionality, the aircraft is flown completely manually when the gyro is off.
Optimized mode-
Utilizing advanced solid-state gyros, the Reflex system maintains aircraft attitude by counteracting inflight upsets- from gusts to crosswinds. With Reflex, even small aircraft will fly with the confidence of something much larger!
Operation instructions
- SBUS\PPM input: Connect the 3-wire cable into the port that is labelled SBUS\PPM. Ensure that the polarity of the cable is correct. The default channel assignment is aileron, elevator, throttle, rudder and mode switch (Note: Different aircraft may have different flight modes, refer to your aircraft manual for more information). If the channel assignment does not fit that of your transmitter system, change the channel order from your transmitter.

- PWM: Connect the throttle and flight surface channels to their corresponding ports on the Reflex system. Connect a 3 wire cable from the channel that is controlled by your 3 position switch to the port labelled SBUS\PPM to control the gyro mode.

If you are using a 4 channel transmitter, use the included jumper to select between flight modes by plugging it into the “gyro mode input” port.
Note: The flight controller operates under stabilized mode by default. Plugging the jumper cable into the gyro mode input port changes the gyro mode to Optimized mode.
Operation: Turn on your transmitter first, then turn on your receiver. Set your aircraft down on a flat surface and have it remain level (the flight controller LED will flash rapidly). When the gyro is properly calibrated, the aileron servos will cycle 3 times in rapid succession; then the elevator will cycle 3 times in rapid succession- this signifies that the aircraft is ready for flight. Check that your 3-position switch is functional and that all channels are operating correctly.
NOTE
GYRO LED ON- Stabilized mode
GYRO LED FLASHES SLOWLY- Gyro off
GYRO LED FLASHES RAPIDLY- Optimized mode
Aircraft model update
- Visit (https://www.fmshobby.com/pages/reflex-v2), download the Reflex 3.0 software.
- Double click on “FMS PARAM V3.0” to initiate the software.
- Connect a type-C cable from your computer to the Reflex type-C port.
- Once successfully connected, the interface will show all downloadable aircraft options along with what is currently loaded on the flight control software.
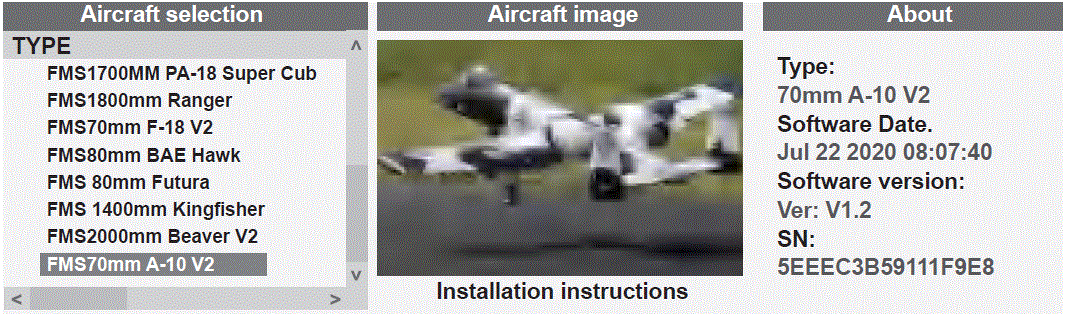
- Double click on the new aircraft you would like to load onto Reflex. The software will show “FMS param update”, click “OK” and wait for the audible tone (please turn up your system volume). The audible tone indicates that the new aircraft setting have been successfully loaded.
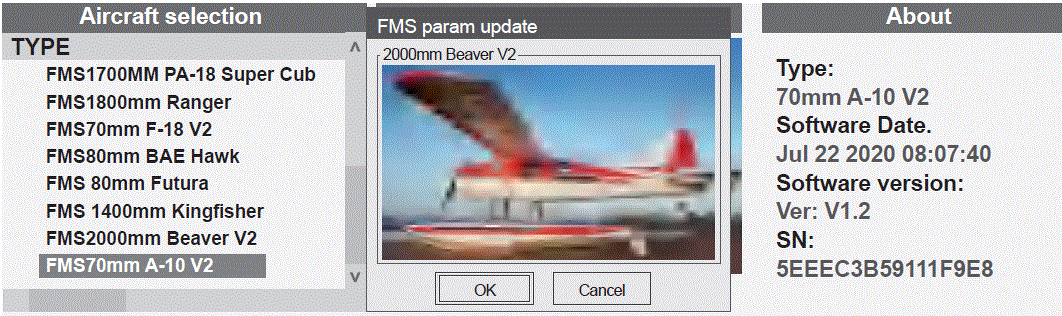
- Update complete
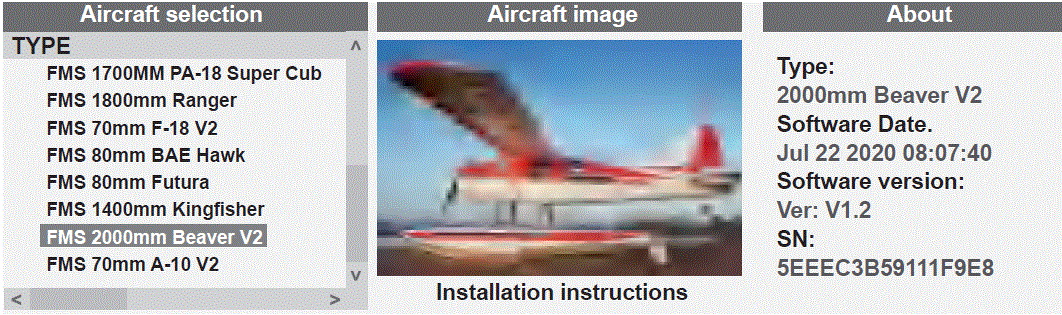
Aircraft model update
Software Download
Search for “FMSHOBBY” on the App Store/Google Play or scan the QR code in the Reflex V3 manual to download the app.
II. Launch the App and Enter the Home Page
After a 3-second display on the startup page, it automatically transitions to the home page.
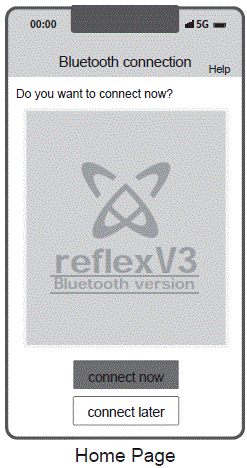
On the home page, click the “Connect Now” or “Connect Later” button at the bottom of the screen.
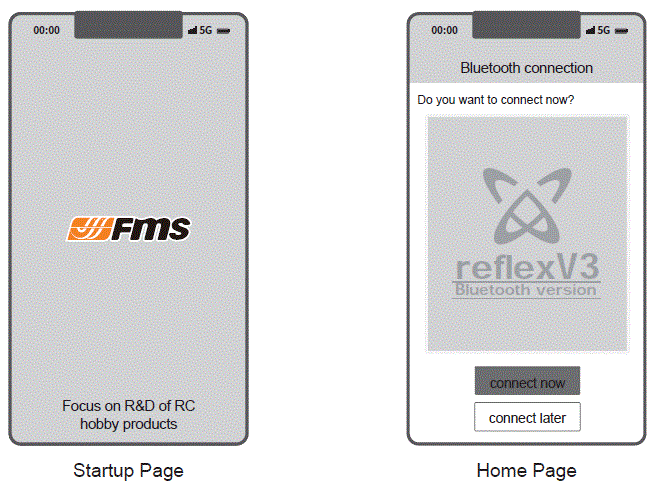
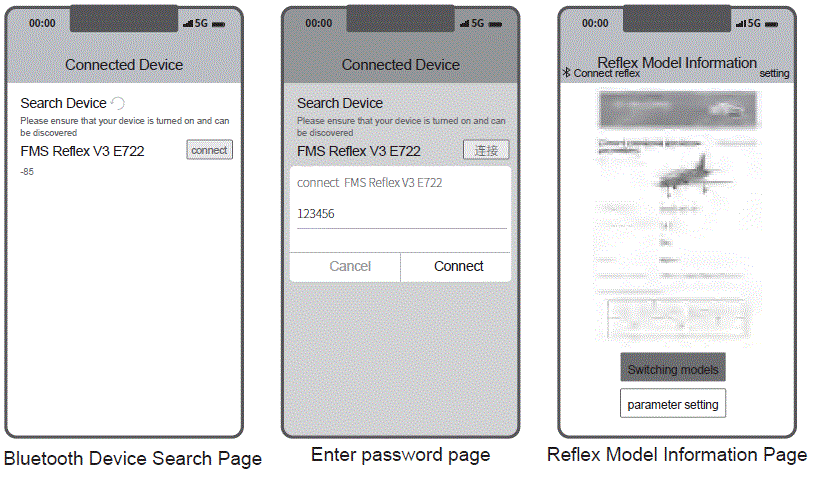
If you click the “Connect Now” button, it will navigate to the “Bluetooth Device Search” Page.
Click on FMS Reflex V3 E722(the last four bytes are different for each device) and enter the default connection password: 123456 to connect to the Reflex V3 device. It will then transition to the “Reflex Model Information” Page.
Note: The device’s Bluetooth name and connection password can be customized.
The Bluetooth device name can only be modified at the last four bytes. For example, in “FMS Reflex V3 E722,” only the information at “E722” can be customized, It supports a maximum of 6 bytes, allowing a mix of numbers and letters.
The connection password supports a maximum of 6 bytes, allowing a mix of numbers and letters for input.
If you click the “Connect Later” button, it will go to the “Reflex Model Information” Page.
(Note: If you click the “Connect Later” button, the information displayed on the “Reflex Model Information” Page is for demonstration purposes only and does not reflect real-time device information.)
Aircraft model update
Model Switching & Parameter Setting
Model Switching
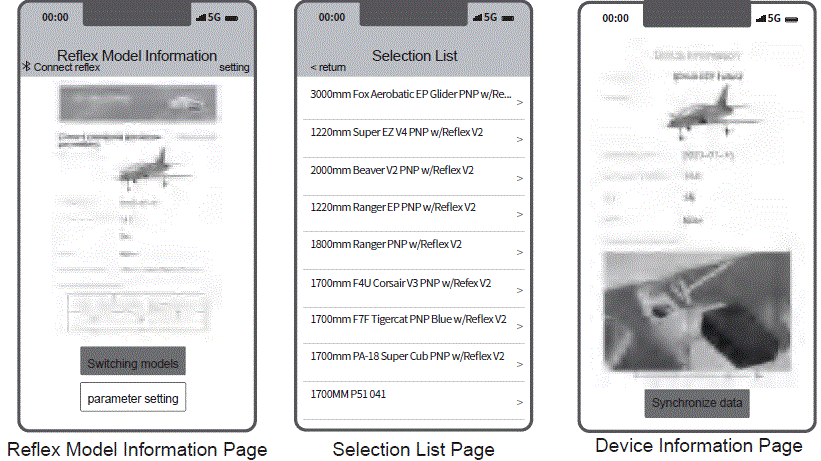
- On the “Connected device” Page, click the “Model Switching” button at the bottom of the screen to enter the Selection List” page.
- Choose the appropriate FMS model or Customized Model according to your actual needs in the Selection List.
- Click the “Synchronize Data” button on the popped-up “Device Information Page” to automatically synchronize preset parameters and navigate to the corresponding “Reflex Model Information” Page.
Parameter Setting (Applicable to FMS and Other Models)
- On the “Reflex Model Information” Page, click the
“Parameter setting” button at the bottom of the screen to enter the “Parameter setting Page”.- Adjustable parameters for FMS models: Aileron setting, Elevator setting, Rudder setting.
- Adjustable parameters for other models: Gyroscope Setting, Aileron Setting, Elevator Setting, Rudder Setting.
- After adjusting the parameters as needed
Click the “Synchronize” button at the bottom of the page to synchronize the adjusted parameters and automatically return to the “Reflex Model Information”Page.
Click the “Reset” button to restores default parameter values.
Click the “Back” button returns to the “Reflex Model Information” Page.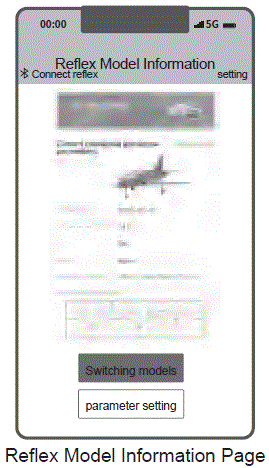
Modify device Bluetooth name, password and restore default password.
Restore Default Password
To access the home page, click on the “Help” button located in the top right corner.
You will find instructions on restoring the default password.
Modify Device Bluetooth Name
- Click the “setting” button in the upper right corner of the “Reflex Model Information Page” to enter the setting page.
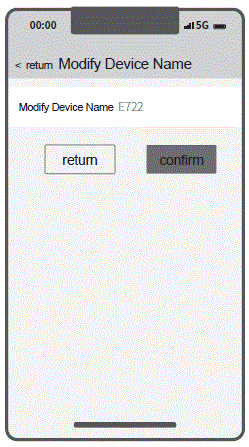
- Click on the device name to modify the last four bytes.
(Note: The Bluetooth name supports customization of the last four bytes only. For example, in FMS Reflex V3 E722, only the “E722”can be customized.)
Change Password
- Click the “Setting” button in the upper right corner of the “Reflex Aircraft Model Information Page” to enter the setting page.
- Click the password to customize it.
This device complies with Part 15 of the FCC Rules. Operation is subject to the following two conditions: (1) this device may not cause harmful interference, and 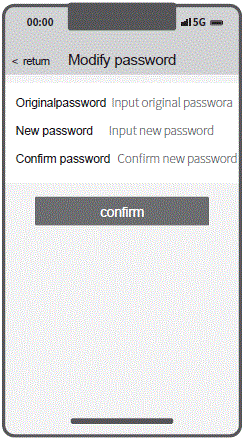
FCC ID
This device complies with Part 15 of the FCC Rules. Operation is subject to the following two conditions:
- This device may not cause harmful interference, and
- This device must accept any interference received, including interference that may cause undesired operation.
This device has been tested and found to comply with the limits for a Class B digital device, pursuant to Part 15 of the FCC Rules. These limits are designed to provide reasonable protection against harmful interference in a residential installation. This device generates, uses and can radiate radio frequency energy and, if not installed and used in accordance with the instructions, may cause harmful interference to radio communications.
However, there is no guarantee that interference will not occur in a particular installation. If this device does cause harmful interference to radio or television reception, which can be determined by turning the device off and on, the user is encouraged to try to correct the interference by one or more of the following measures:
- Reorient or relocate the receiving antenna.
- Increase the separation between the device and receiver.
- Connect the device into an outlet on a circuit different from that to which the receiver is connected.
- Consult the dealer or an experienced radio/TV technician for help
Changes or modifications not expressly approved by the party responsible for compliance could void the user’s authority to operate the equipment
FCC ID: 2BEE5-REFLEX
In compliance with laws and regulations, our company has the final right to interpret this instruction manual. Our company reserves the right to update, revise or terminate this manual without prior notice. From the date of the update and revision of the instruction manual, the instruction manual shall be implemented according to the updated and revised content. Players can visit the FMS official website or FMS Reflex APP to check the latest version manual to learn about new functions and new operation guides.
- Foshan Zhengze Model Technology Co., Ltd.
- Tel: +86-0757-26330080
- E-mail: support@fmsmodel.com
- Add: Unit A, Building 6, Jicheng Science and Technology Innovation Park, Shunde, Foshan City, Guangdong Province, 528306
Documents / Resources
 | Reflex V3 Stable Flight Controller |
References
- User Manualmanual.tools
What is the optimizing mode and manual mode active bar adjustment?
What is Optimized mode and how do I adjust the active bar settings?
Based on the FMS Reflex V3 manual, here is the breakdown of the modes and adjustment settings:
Note: On the Reflex V3, the LED will flash rapidly when Optimized mode is active, and flash slowly when the gyro is OFF (Manual mode).
Read the full Q&A page
Bonjour, comment inverser le sens de correction du gyro svp, seul mes ailerons corrige correctement et dans le logiciel impossible d’inverser..!
Merci pour votre réponse ( le Gyro est bien positionné dans le bon sens)
Merci pour votre réponse ( le Gyro est bien positionné dans le bon sens)
How do I reverse the gyro correction direction for the ailerons on the FMS Reflex V3?
To reverse the gyro correction direction on the FMS Reflex V3, you must use the FMSHOBBY mobile app (available on the App Store or Google Play) via Bluetooth, as the V3 version supports parameter settings through this interface.
Follow these steps to adjust the directions:
123456).Note: The manual specifies that while basic parameters can be viewed on a computer, detailed parameter setting functions like reversing directions are specifically supported by the mobile app.
Read the full Q&A page
The Reflex V3 in my piper cub model has become unstuck from the model. What is the correct location and orientation of the V3 relative to the model?
What is the correct location and orientation for the FMS Reflex V3 flight controller in a Piper Cub model?
To ensure the FMS Reflex V3 flight controller functions correctly in your Piper Cub, follow these installation guidelines:
Note: Since the Reflex V3 supports customizable parameters via the FMSHOBBY app, ensure you have the correct "Piper Cub" (e.g., 1400mm J3 Cub V4 or 1700mm PA-18 Super Cub) profile loaded to match the controller's physical orientation to the software's expectations.
Read the full Q&A page